APEX Plug-ins
Prerequisites
The APEX Office Print APEX plug-ins requires Oracle APEX 5.0.4 or higher.
The AOP plug-ins are relying on a PL/SQL package (aop_api_pkg which is a synonym for aop_api_pkg) that needs to be compiled first.
To make the package available, go into SQL Plus, SQLcl, SQL Developer or SQL Workshop and run the SQL Script aop_db_pkg.sql which you find in the db directory of the zip you downloaded. For the AOP Modal APEX plug-in also run aop_modal_pkg.sql.
Alternatively, you can run the install.sql file which will install some additional packages which show case how to use AOP from PL/SQL.
If you imported the AOP Sample App and ran the Supporting Objects, the packages are automatically installed.
Import and Configure
Follow these steps to import the plug-in in your application:Access your target Workspace.
Select the Application Builder.
Select the Application where you wish to import the plug-in > (plug-ins belong to an application, not a workspace).
Access Shared Components > Plug-Ins.
Click Import >.
Browse and locate the plug-in installation file. In the AOP zip file, they can be found under apex_version_X.X/plugin. You will need one of the following files depending on the plug-is you wish to use:
- dynamic_action_plugin_be_apexrnd_aop_da.sql (AOP DA Plug-in)
- dynamic_action_plugin_be_apexrnd_aop_modal.sql (AOP Modal Plug-in)
- dynamic_action_plugin_be_apexrnd_aop_convert_da.sql (AOP Convert Plug-in)
- process_type_plugin_be_apexrnd_aop.sql (AOP Process Plug-in)
Complete the wizard.
(Optional) Repeat these steps for remaining AOP Plug-ins.
Follow these steps to finish your Plug-in installation by adding your Plug-in API key:
- Login into https://www.apexofficeprint.com
- Copy your API key from the Dashboard (No API Key needed for on-premises installations -only needed if using the AOP Cloud Service).
- Access your target APEX Workspace.
- Select the Application Builder.
- Select the Application where you have installed the plug-ins (plug-ins belong to an application, not a workspace).
- Access Shared Components > Component Settings.
- Here select APEX Office Print (AOP) [Plug-in].
- Add you API key that you copied in step 2.
- Click Apply.
- (Optional) Repeat steps 7 - 9 for all remaining AOP plug-ins
- Installation is now completed
To use the AOP PL/SQL API you may need to configure your ACL (Access Control List) settings to allow access to: http(s)://api.apexofficeprint.com
For more details please refer to Oracle APEX installation guide:
APEX 21.2
Change the following script with your APEX version:
BEGIN
    DBMS_NETWORK_ACL_ADMIN.APPEND_HOST_ACE(
        host => '*',
        ace => xs$ace_type(privilege_list => xs$name_list('connect'),
                           principal_name => 'APEX_210200',
                           principal_type => xs_acl.ptype_db));
END;
/
In case you want to update some plug-in settings, you find the plug-in settings in Shared Components > Component Settings > APEX Office Print (AOP) [Plug-in].
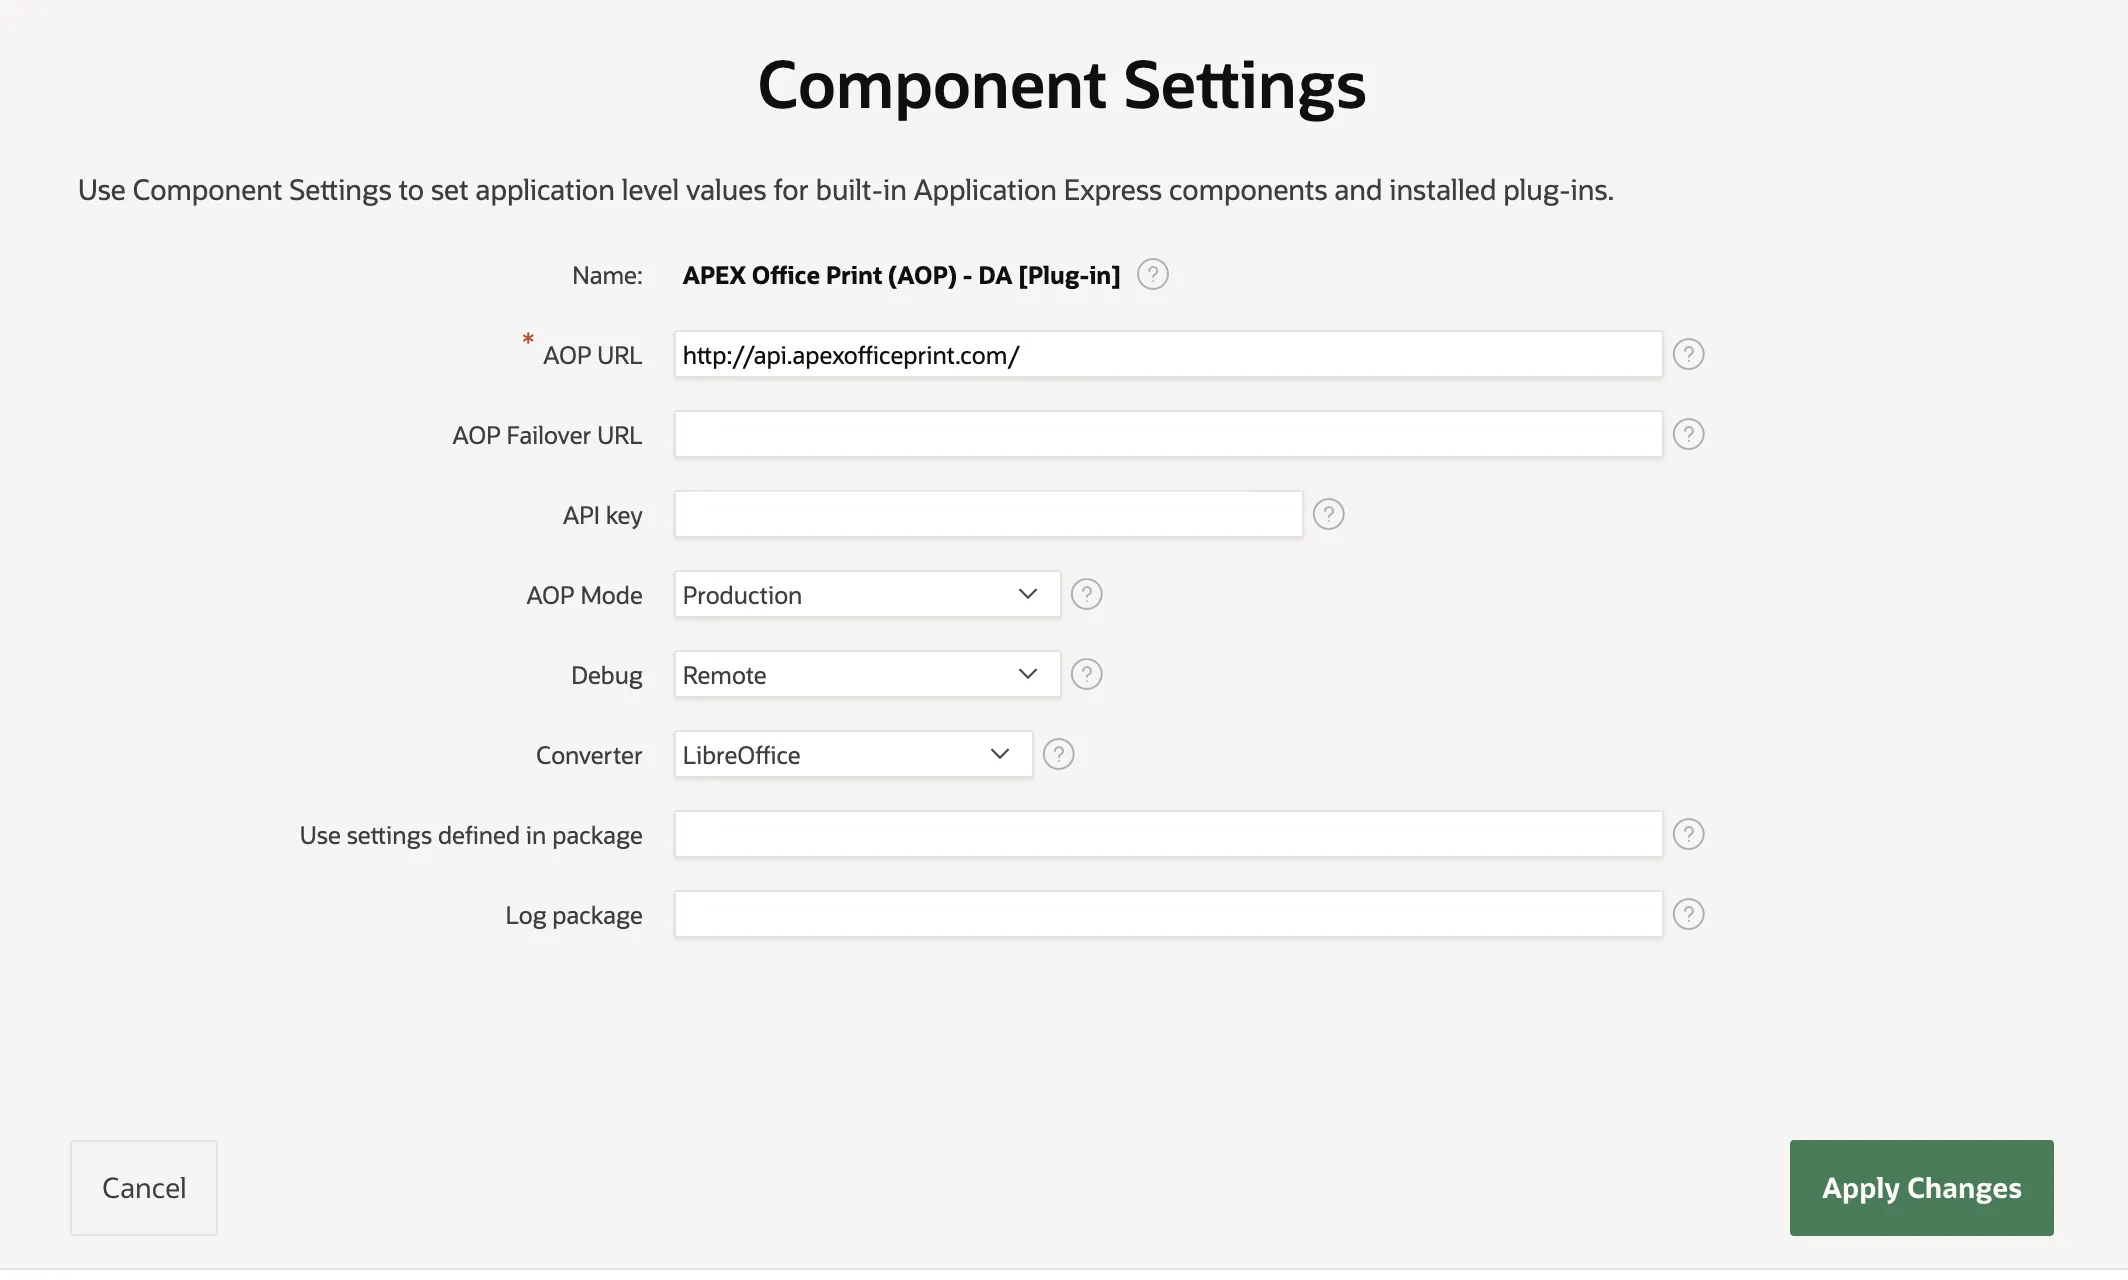
You can change the AOP URL, AOP Failover URL (and Procedure which is being called on failover), API Key, Debug and specify a package where those settings are specified. You can also specify a Log package which will be called on every request, so you can monitor directly from your Oracle database if prints are successful. If you use the on-premises version of AOP you can also change the Converter.
Since AOP 19.1 it's possible to change the AOP Mode to Development, which means you don't use any credits in our AOP Cloud and have unlimited prints/reports (ignored by AOP On-Premises version). In AOP Development Mode a text box (watermark) will be included at the top of the document.
To generate a PDF, APEX Office Print is using an external converter. By default, LibreOffice is used (available on all platforms), but this can be changed to MS Office (Windows only). It is also possible to use a custom converter. The custom converter needs to be defined inside the aop_config.json file. See Installation section for more information.