AOP Installation with ACL and Wallet Configuration Guide
Objective
This guide provides detailed instructions on downloading and installing Apex Office Print (AOP), configuring Access Control List (ACL) and Oracle Wallet, and ensuring secure communication between the database and API. Finally, you will configure the export functionality in your application to export reports to a Word document using the button.
Steps
Downloading AOP
- Go to apexofficeprint.com and log in. If you don’t have an account, create one.
- On the left-hand side, click the Downloads button. Download the latest version of the cloud package, which will be in a .zip format.
- Extract the .zip file. This will contain multiple folders for different APEX versions, each with necessary files for installation.
API Connectivity Check
Before installing packages or plugins, verify that the Oracle database can connect to the AOP API.
- In the database, use the ping command to test connectivity to api.apexofficeprint.com.
- You can also test connectivity with curl:
curl http://api.apexofficeprint.com/marco
This should return a Polo response.
Alternatively, use Oracle APEX with the following code to verify connectivity:
DECLARE
  l_response CLOB;
BEGIN
  SELECT apex_web_service.make_rest_request('http://api.apexofficeprint.com/marco', 'GET') INTO l_response FROM dual;
  dbms_output.put_line(l_response);
END;
This should return a Polo response.
If you encounter the error network access denied by ACL, as shown in the image, it indicates that Oracle blocks outgoing RESTful requests by default.
This error typically occurs when you attempt to run this command for the first time.

In order to resolve this issue, you need to configure the Access Control List (ACL).
Solution: Configuring the Access Control List (ACL)
Ensure you have DBA access to configure ACL settings.
Use the following code to add the AOP API host
api.apexofficeprint.comto the ACL with your APEX principal name. Since this documentation uses Apex version 23.1, APEX_230100 is the correct principal name for this version.
If you are using a different Apex environment, please refer to the documentation for the appropriate code to executeBEGIN
DBMS_NETWORK_ACL_ADMIN.APPEND_HOST_ACE(
host => 'api.apexofficeprint.com',
ace => xs$ace_type(privilege_list => xs$name_list('connect'),
principal_name => 'APEX_230100',
principal_type => xs_acl.ptype_db));
END;Re-run the initial connectivity code to confirm that the setup was successful.
You should receive aPoloresponse, confirming connectivity.
Installing Apex Office Print
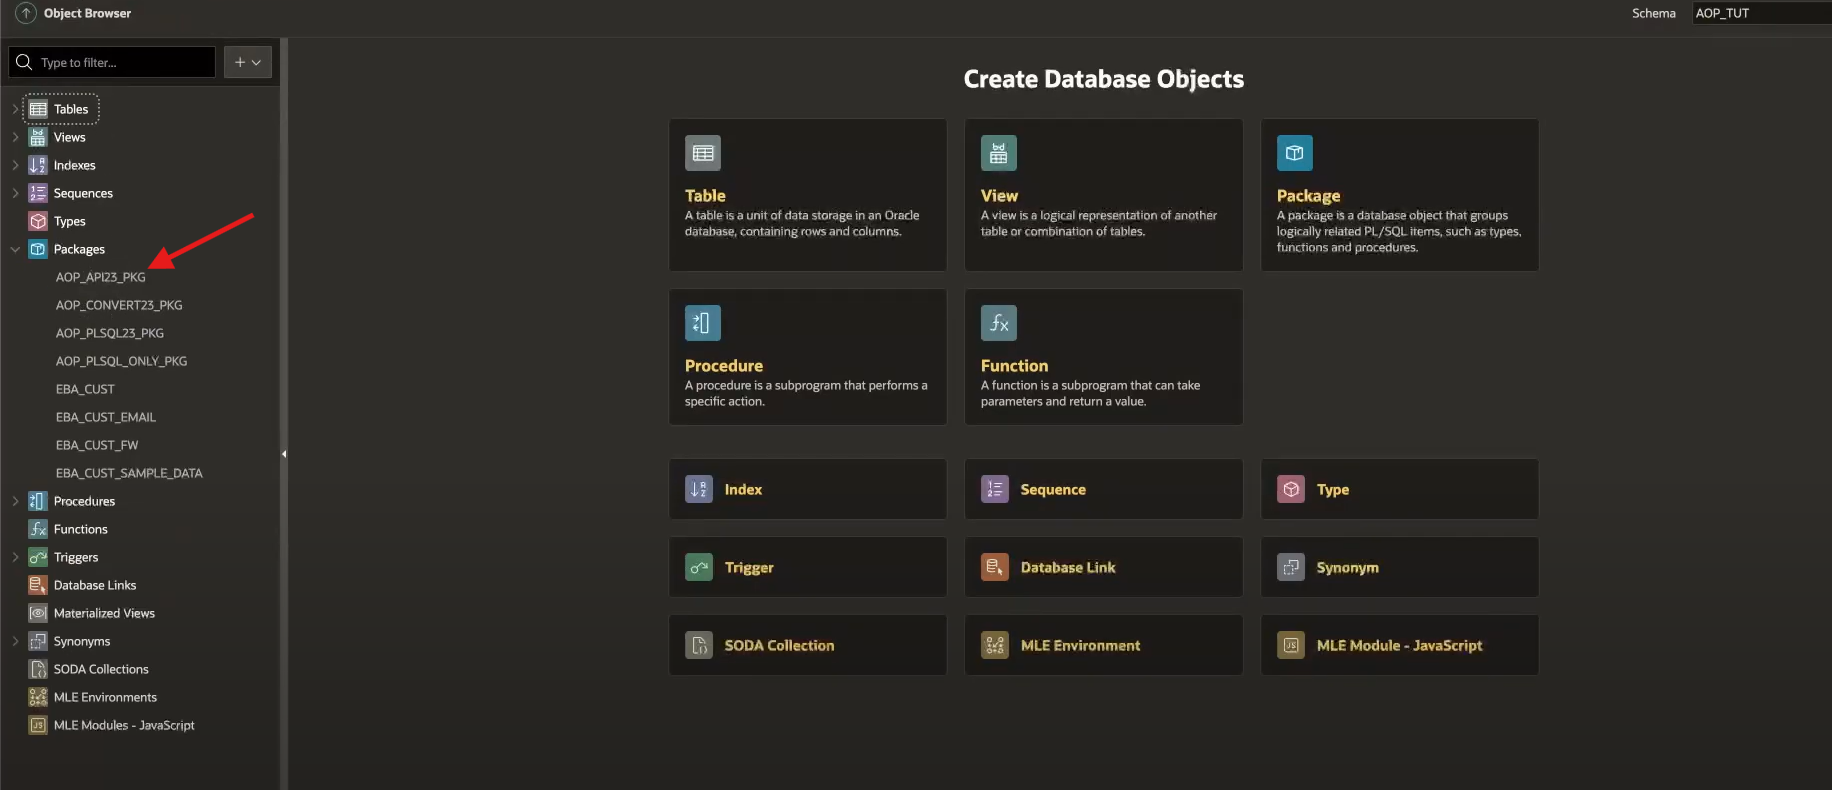
Installing the Database Package
- In Oracle APEX, go to SQL Workshop > SQL Scripts.
- Upload the
aop_db_pkg.sqlfile found in the db folder for your APEX version (e.g., version 23.x). - Run the script. If it completes successfully without errors, the database package is correctly installed.
NOTE: This database package can be seen in the packages section of the Oracle APEX SQL Workshop

Installing the Plugin
- Go to Shared Components > Plugins in your Oracle APEX application.
- Import the AOP plugin. Locate the plugin in the extracted files under the plugins folder.
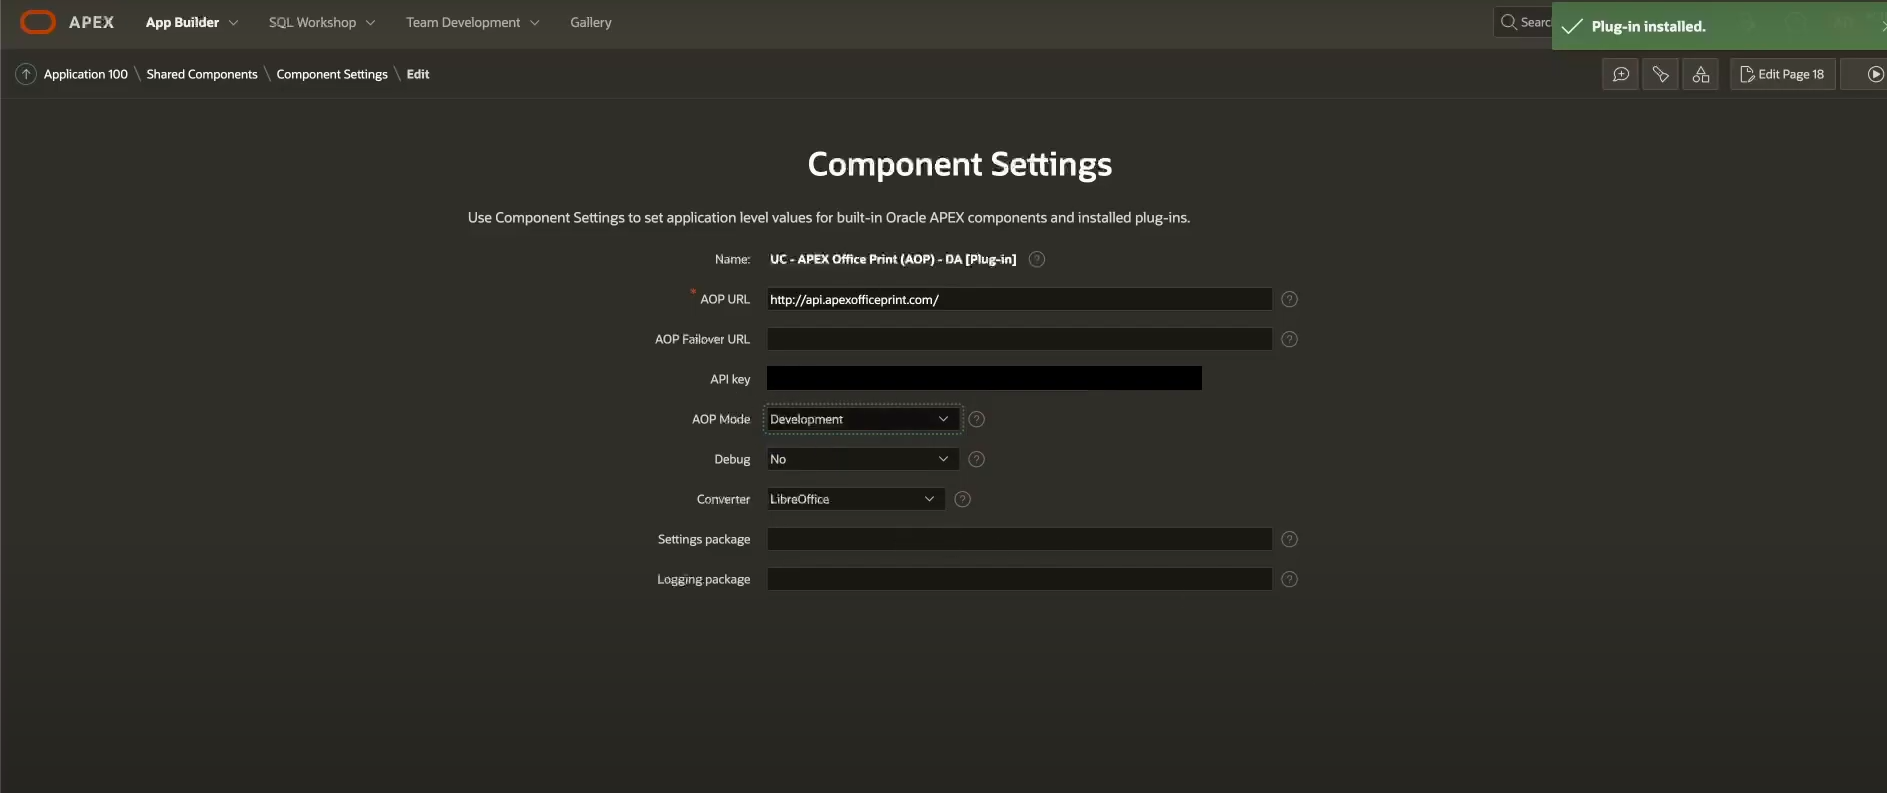
This guide usesdynamic_action_plugin_be_apexrnd_aop_da.sql. - Once installed, configure the plugin settings:
- For the moment, use an HTTP connection.
- Enter your API Key from the AOP dashboard.
- In AOP Mode, select
Development(for testing without using credits, though a watermark will appear on exported documents) orProduction(credits required).

- Apply the changes to save the configuration.
NOTE: These installation steps are only necessary once per application.
The package installation occurs at the workspace level, and the plugin installation is at the application level.
Configuring the Button to Export Report.
- Create a page with all the necessary regions and a button. Assign a static ID (e.g.,
contacts) to the report. Then, create a dynamic action on the button from which you want to trigger an export report action. - In the True Action section, select UC-APEX Office Print (AOP) - DA (Plugin).
- Choose the appropriate template type. This guide uses the AOP Report template with a Region data type.
- Set the same Static ID(e.g.,
contacts) in the Dynamic Action’s Region Static ID setting. - Save the changes. The export button should now work, but remember that development mode includes a watermark on exported documents.
Securing API Communication with HTTPS.
- Execute the following code to test the https connection:
DECLARE
  l_response CLOB;
BEGIN
  SELECT apex_web_service.make_rest_request('https://api.apexofficeprint.com/marco', 'GET') INTO l_response FROM dual;
  dbms_output.put_line(l_response);
END;
If you receive a certificate validation error, it means the Oracle database cannot verify the AOP server’s SSL certificate.
Obtain the certificate:
- Obtain a certificate from the
- Downloads
Logbutton on the URL.- Go to
Connection is secure>Certificate is valid>Detailsand export it.
- Go to
- Alternatively, you can get it from the AOP Documentation:
HTTPS Configuration or use OpenSSL to retrieve it.
- Store the certificates in a designated directory and rename them appropriately (e.g., root certificate as amazon_root_ce_1.pem).

Oracle Wallet Setup
- Create an Oracle Wallet and import the root certificate. Verify the wallet contents to ensure the root certificate is included in the Trusted Certificates.

- Set the wallet path in Oracle APEX’s instance settings to complete the configuration.

Give the location /home/oracle/ssl as shown in image above on the oracle wallet on your instance.

- Re-run the HTTPS connectivity code. You should receive the
Poloresponse, confirming secure communication.
DECLARE
  l_response CLOB;
BEGIN
  SELECT apex_web_service.make_rest_request('https://api.apexofficeprint.com/marco', 'GET') INTO l_response FROM dual;
  dbms_output.put_line(l_response);
END;
NOTE: You can get detailed information from our YouTube video.